

DevOps & Kubernetes: How to Leverage Kubernetes’s Full Potential for DevOps
DevOps involves a lot of automation, which is why tools like Kubernetes and Instatus are often used in DevOps workflows. When it comes to the different life cycle phases in DevOps, deployment can be one of the trickier ones, especially if you’re aiming for a high deployment frequency.
Luckily, Kubernetes specializes in automating deployment and managing containerized software. Curious? Read on to find out more.
What is Kubernetes?
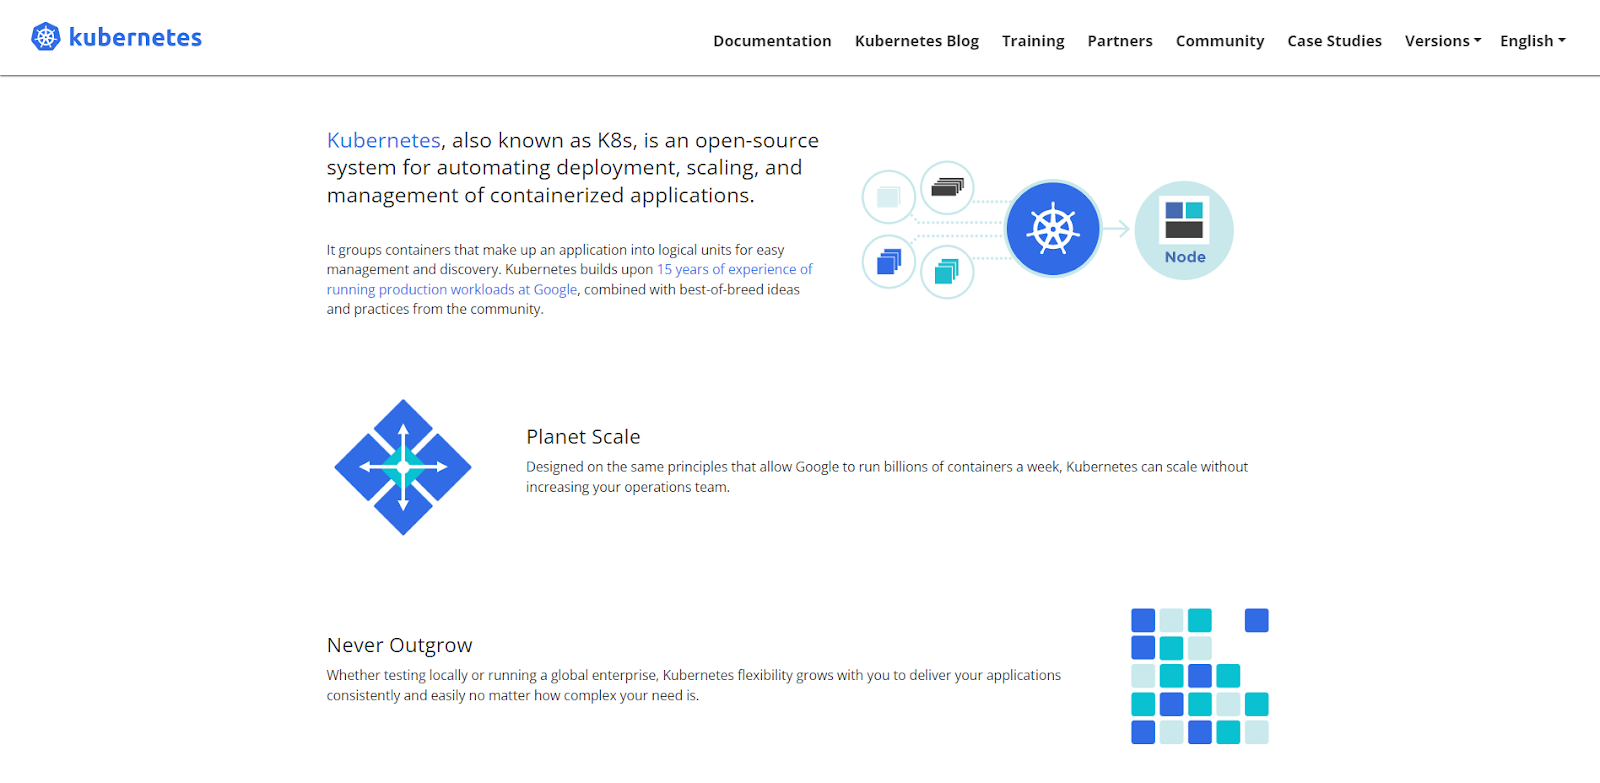
Kubernetes is an open-source container orchestration platform, which helps you automate the deployment, scaling, and management of containerized applications in DevOps workflows.
Containerization involves bundling all the code from a piece of software with the files and libraries needed to run the code. This allows the code to run in an infrastructure isolated from the public user space whilst still sharing the same OS. With containerization and the help of Kubernetes, you can build and deploy software updates without any downtime.
Why use Kubernetes for DevOps?
Infrastructure and Configuration as Code
Kubernetes helps you build infrastructure as code (IaC) so you can better manage DevOps infrastructure. You can also use Kubernetes to manage configuration as code and link your repository (including configuration files) to Kubernetes. This way, you can automatically set up new environments instead of executing a script every time.
Efficient Server Usage
Kubernetes helps balance your server load to ensure your server usage stays efficient during software deployment. This way, you don’t have to worry about heavy loads or overpaying for server usage.
No Downtime for Deployment
With Kubernetes, you’re able to develop and deploy updates without taking down your application. This allows customers to access your software during this process, eliminating unnecessary downtime whilst increasing your deployment frequency.
Consistency in the Development, Testing, and Deployment Environment
Working inside a container allows for better collaboration between teams. This is due to the environment, which remains consistent throughout the different delivery stages, including development, testing, and deployment.
How to Leverage Kubernetes’s Full Potential for DevOps
Learn the Basics of Kubernetes
Before you can start utilizing Kubernetes in your DevOps workflow, you must first learn the basics of the tool. This includes its core features, what they do, and how to use them.
Kubernetes has a range of different uses, but we’ll mainly be focusing on its containerization technologies and how to integrate it into your CI/CD (continuous integration and continuous deployment) processes.
Before we get into any core features, however, let’s start with some basic terminology. Here are some words and phrases you must know in order to understand Kubernetes as a tool fully:
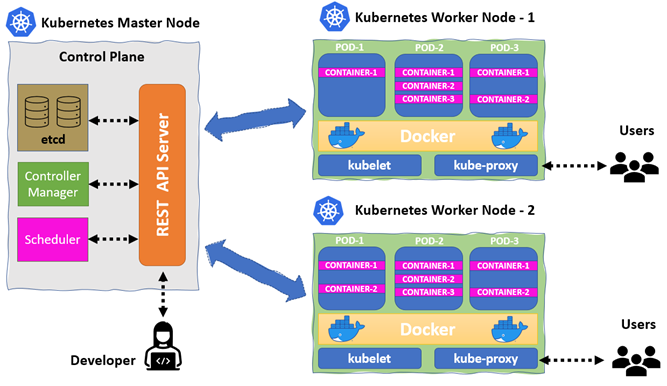
Cluster
A collection of nodes that operate within containerized applications. The cluster contains a master node (manages workloads and clusters) and several worker nodes (runs containerized applications and manages networking).
Pod
A pod refers to a group of one or more containers operating together in a cluster. Pods are the smallest deployable units you can create in Kubernetes.
Workload
You can use workloads to create deployment rules for a set of pods.
Node
A node is a physical or virtual worker machine in Kubernetes. Each node is managed by the control plane and contains the kube-proxy, kubelet, and container runtime.
Kubelet
The kubelet runs on every node and registers each node with the API server.
Kubernetes API Server
The API server configures and validates data for API items such as pods and services.
Service
Services allow you to make a set of pods accessible on the network so clients can interact with them.
Kube-proxy
This is a network proxy that runs on every node.
Kubectl
This is a command line tool that helps you communicate with the API server.
Kube-scheduler
This is the default scheduler, which schedules pods into nodes.
Kube-controller-manager
The Kube-controller-manager is in charge of embedding core control loops shipped with Kubernetes. A control loop is a continuous loop that maintains the state of the system.
DaemonSet
A DaemonSet creates pods whenever a new node is added to a cluster. Removing a daemon set will also remove all the pods it created.
Controller
These are control loops that monitor your cluster’s state. They request or make changes when necessary to move your cluster’s state closer to the desired one.
etcd
etcd is an open-source key-value store that Kubernetes uses to store and manage all their cluster data.
Ingress
Ingress is an API object that allows external access to services in your cluster.
Deployments
A deployment in Kubernetes gives you declarative updates for ReplicaSets and Pods.
ReplicaSet
A ReplicaSet maintains a stable collection of replica pods.
UIDs
A generated name string is used to identify unique items. Every object created in a cluster is assigned its own UID.
Namespace
Namespaces help you isolate a collection of resources within a cluster.
Minikube
This is a lightweight tool for creating single-node clusters.
Control Plane
Manages the cluster and coordinates activities such as scheduling, updates, and scaling applications.
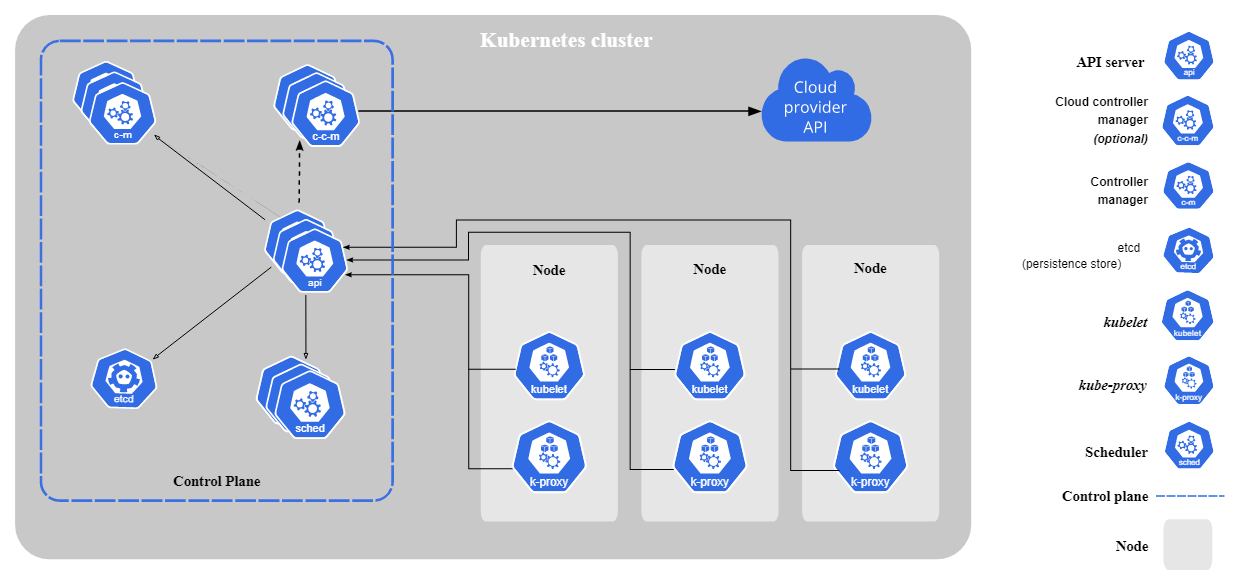
Set up a Kubernetes Cluster
Now that we’ve gone through some basic terms, it’s time to get started with Kubernetes features. We’ll first be going through how to make a cluster. There are six main components in a cluster:
- Scheduler
- API server
- Controller
- etcd
- Kube-proxy
- Kubelet
The first four operate on master nodes whilst the other two run on worker nodes.
Creating a Single-Node Cluster
If you want to create a simple cluster with only one node, use Minikube. You’ll also need Kubectl, so make sure to install it as well.
Use the following links to install both tools:
Define Your Application's Deployment and Service
Deployments
Once you’ve set up a cluster, it’s time to create a deployment, which helps monitor the health of your pods and instructs Kubernetes on how to update your application. Use Kubectl to create a deployment, and then deploy your containerized app onto your cluster.
Define a desired state in the deployment — this allows the deployment controller to make changes to your current state at a controlled rate. Deployments are able to create and destroy pods in order to help the current state of your cluster reach the desired state.
After creating a deployment, the control plane should schedule instances of your application to run on nodes in your cluster. Additionally, you can define deployments and make new ReplicaSets.
Services
Next, you should create a service using Kubectl. By default, each pod has its own IP address, so you must expose your pod to the public network to make it accessible from outside Kubernetes’ virtual network. You can use the following Kubectl command to achieve this:
kubectl expose deployment hello-node --type=LoadBalancer --port=8080
Use Kubernetes Namespaces
Use namespaces to isolate resources in your cluster. This is particularly useful when multiple teams or projects are sharing one cluster. Most resources should have a namespace, but some generic ones don’t (e.g., nodes). Resources within the same namespace must have unique names to each other.
There are three default namespaces in Kubernetes:
default
Kubernetes creates this namespace so you can use your cluster without creating a namespace first.
kube-public
Items under this namespace are readable to all clients. It’s mainly for cluster usage.
kube-system
This namespace is assigned to objects created by Kubernetes’ system.
Implement Continuous Integration and Continuous Deployment (CI/CD)
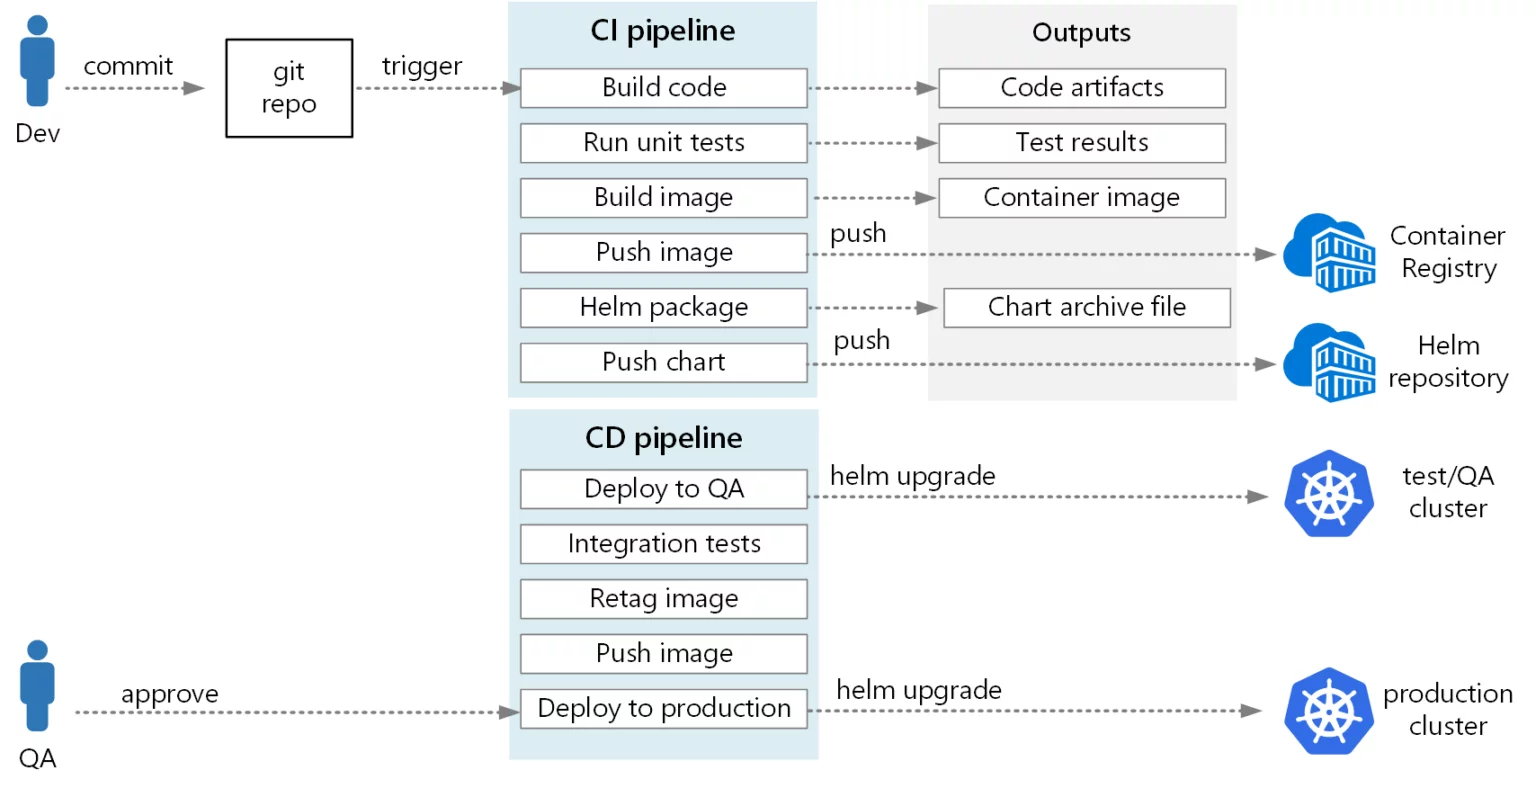
Now it’s time to integrate some DevOps processes with Kubernetes. With containerization and your Kubernetes cluster, you can speed up your continuous integration and continuous deployment workflows. You can easily scale your software, provision resources, and manage container malfunctions.
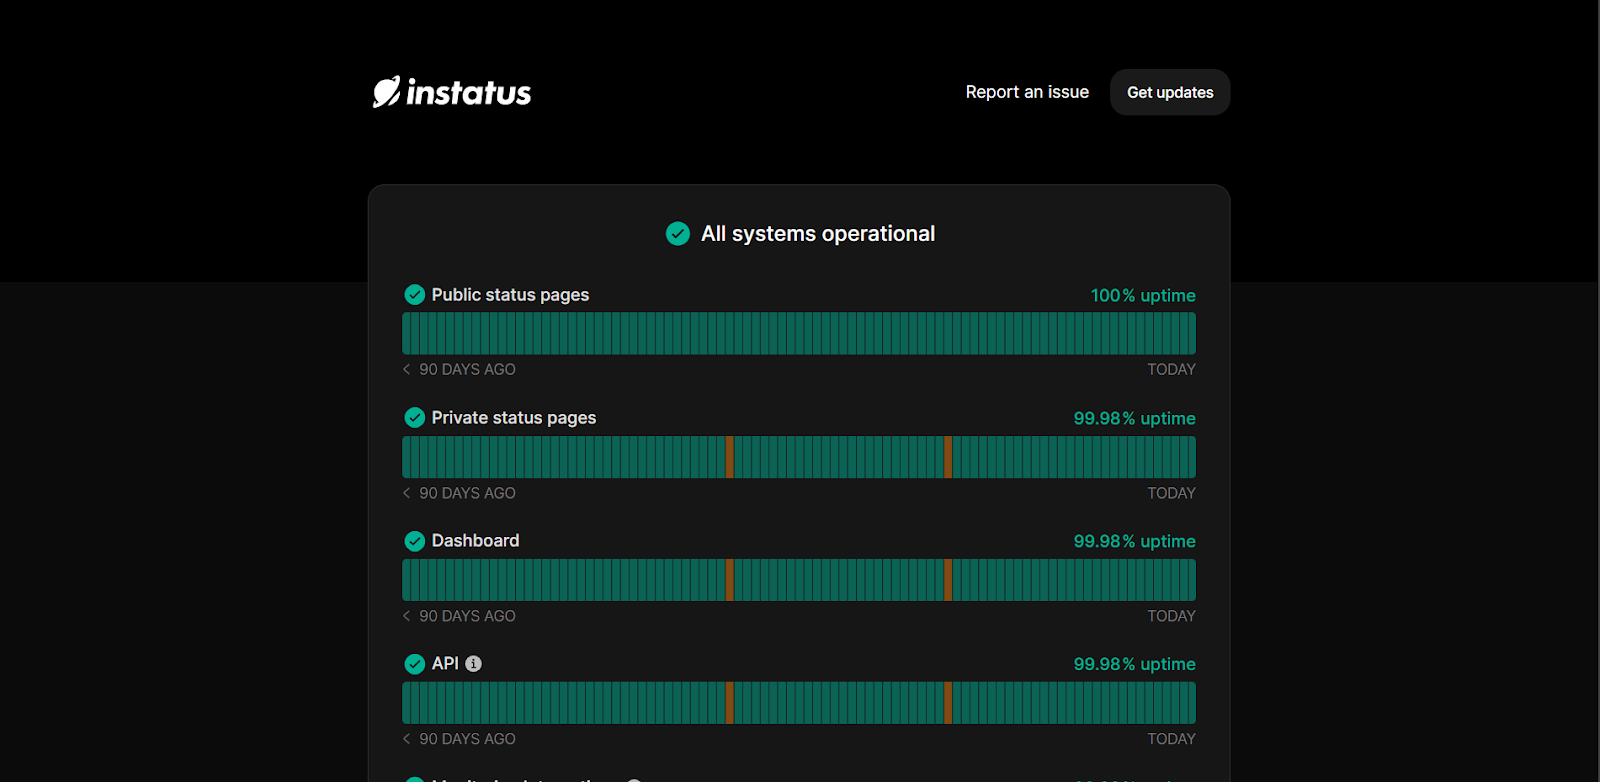
Use a Comprehensive Status Page for Enhanced Visibility
Monitor your software uptime closely with Instatus, which allows you to set up a beautiful status page in just 10 seconds. With Instatus, you can automate your software monitoring and notice issues before customers ask about them.
Our status pages have 99.9% uptime, so you never have to worry about downtime. They’re always quick to load, with newly updated pages regenerating in seconds. You can also view your historical uptime to get a sense of your software stability.
Monitor and Troubleshoot Your Kubernetes Cluster
Finally, it’s time to discuss Kubernetes Monitoring. This involves keeping an eye on clusters to see if any issues occur, such as insufficient resources, faulty pods, nodes struggling to join clusters, and so on.
With Kubernetes monitoring, you can track how resources like CPU and memory are used in the cluster. Cluster operators can get notified whenever specific problems crop up, such as:
- A certain amount of pods are not running due to insufficient resources
- Misconfigurations cause nodes or pods to stop functioning in the cluster
Use the Kubernetes dashboard to get a simple overview of your cluster resources, namespaces, and storage classes.
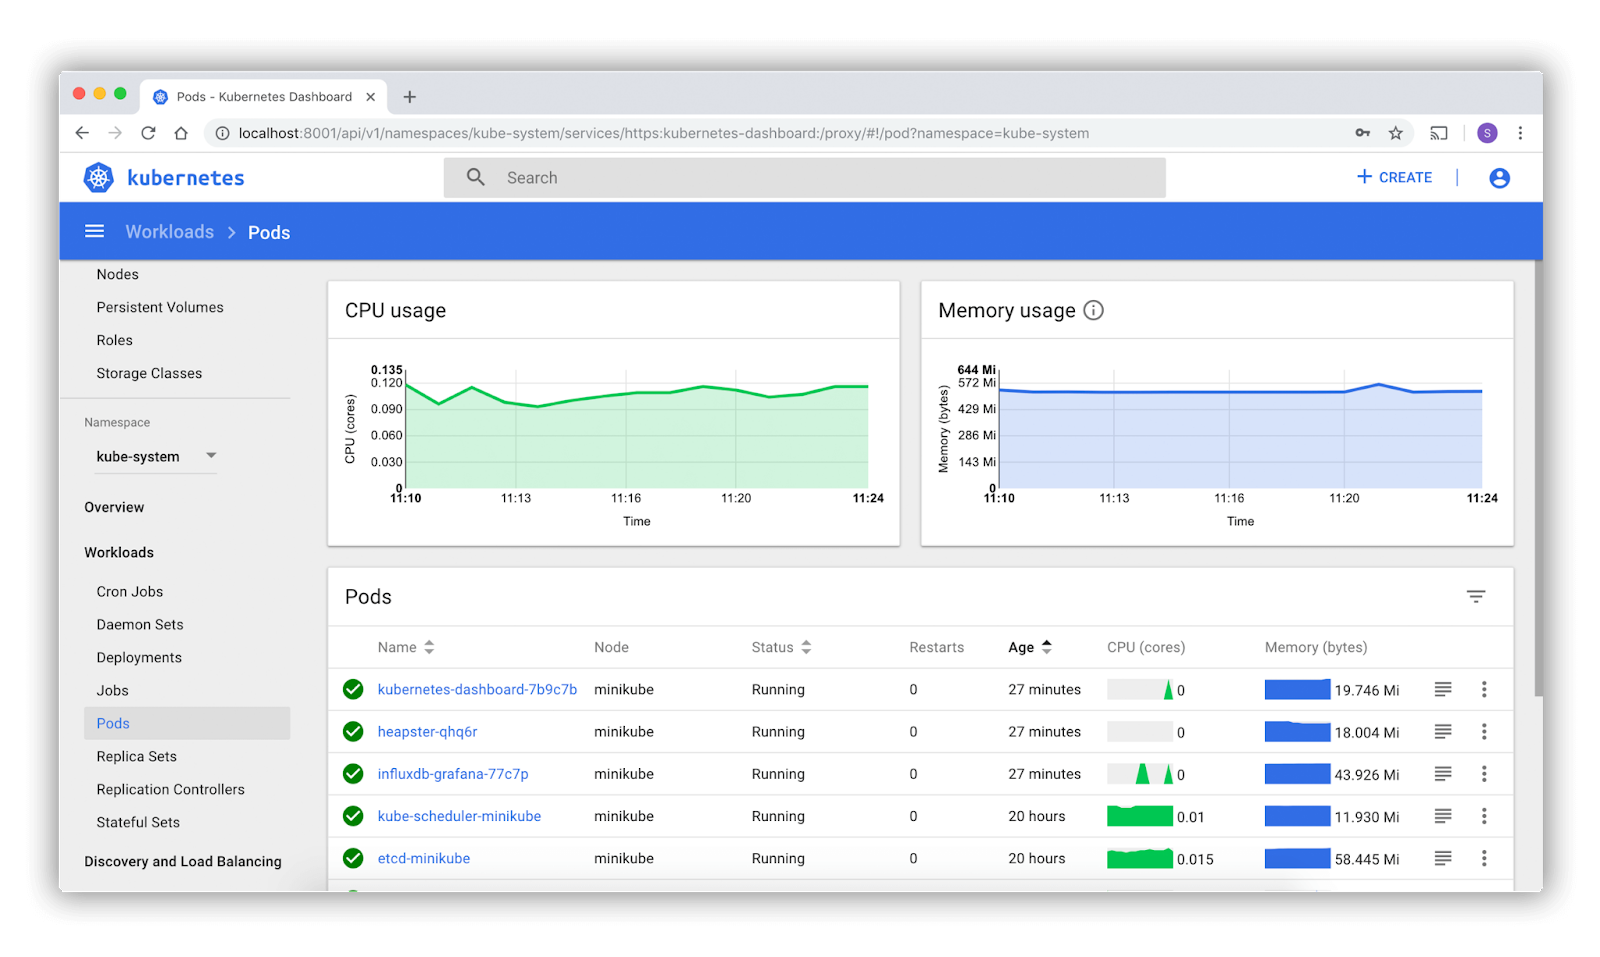
Here are some other things you can view on the dashboard:
- A list of all your nodes, along with aggregated metrics for each one
- Persistent storage claims for every application
- A list of every application running (according to namespace)
- Pod memory usage
- Pods currently ready for deployment
- A list of exposed services
Conclusion
With the help of Kubernetes, you can update your software without any downtime. Instead, you can containerize your applications and use clusters to automate deployments and scaling. During these processes, it’s important to keep an eye on your uptime with Instatus.
Here at Instatus, we provide you with beautiful status pages so you can constantly monitor your software performance. Get your free status page today to automate your uptime monitoring.

Hey, want to get a free status page?
Get a beautiful status page that's free forever.
With unlimited team members & unlimited subscribers!
Start here
Create your status page or login
Learn more
Check help and pricing
Talk to a human
Chat with us or send an email
Statuspage vs Instatus
Compare or Switch!
Updates
Changes, blog and open stats
Community
Twitter, now and affiliates